You may have heard people say: ‘The only way to do a job is the right way!’, and to a point that’s a perfectly reasonable statement. Unless, of course there’s more than one correct method, in which case we might very well have ourselves another of those interminable social media debates that just seem to perpetuate anger, misinformation and downright lies.
So, I’m offering an alternative modus operandi for cleaning carburettors. Back in the day when my old dad rode BSA M21s and Royal Enfield J2s, a blocked carburettor was normally fixed by the side of the road with a metal bristle from a wire brush allied to a bit of puff from the rider’s mouth.
Times have moved on and so has technology. The default now seems to be immersing the various components in a solvent/cleaner of choice and a good blast in an ultrasonic cleaner. This is all well and good if you have the appropriate kit, but what if you only have the one bike, are running on limited resources, or can’t justify an ultrasonic tank capable of cleaning carburettors?
Enjoy everything More Bikes by reading the MoreBikes monthly newspaper. Click here to subscribe, or Read FREE Online.
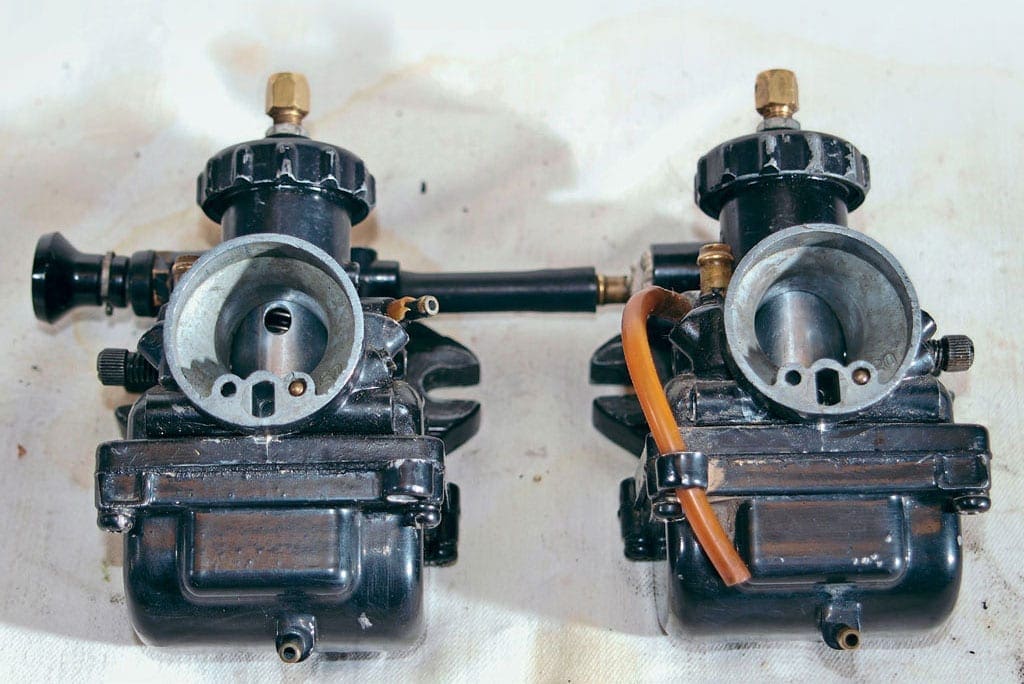
Fortunately, there’s generally a Plan B and we’re fettling a pair of carbs from a drum-braked Yamaha RD200. The owner was complaining about a lack of middle and top-end power, and after cleaning out the exhaust/baffles things didn’t improve, so chances were it was carb related.
Rather unhelpfully, the carbs of the early RD200 were made by Teikie, and genuine OEM parts are rare. There are repair kits out their made by third parties, but they aren’t always necessarily spot on with such things as jet sizes and float valves.
We’re breaking out the tiny spanners and sockets, reaching for the smaller sizes of JIS screwdrivers and employing some rather clever chemistry. These RD200 carburettors were causing issues because the emulsion tubes were only delivering part of their fuel load, not all of it.
At best, the petrol was not being properly atomised and, at worst, the bike was being starved of the correct fuel/air mix. And, potentially, they were throwing neat petrol as a fluid into the motor. This could have diluted the lubrication the bearings, pistons and ring, whilst also causing bore washing.
A couple of hours on the tools in the shed has got the little Yamaha running as sweet as a nut. I’ve skipped over the rebuild and set up of the carbs as it deserves an article all to itself, but at least now you’ll have a method of cleaning carburettors that doesn’t involve expensive kit.
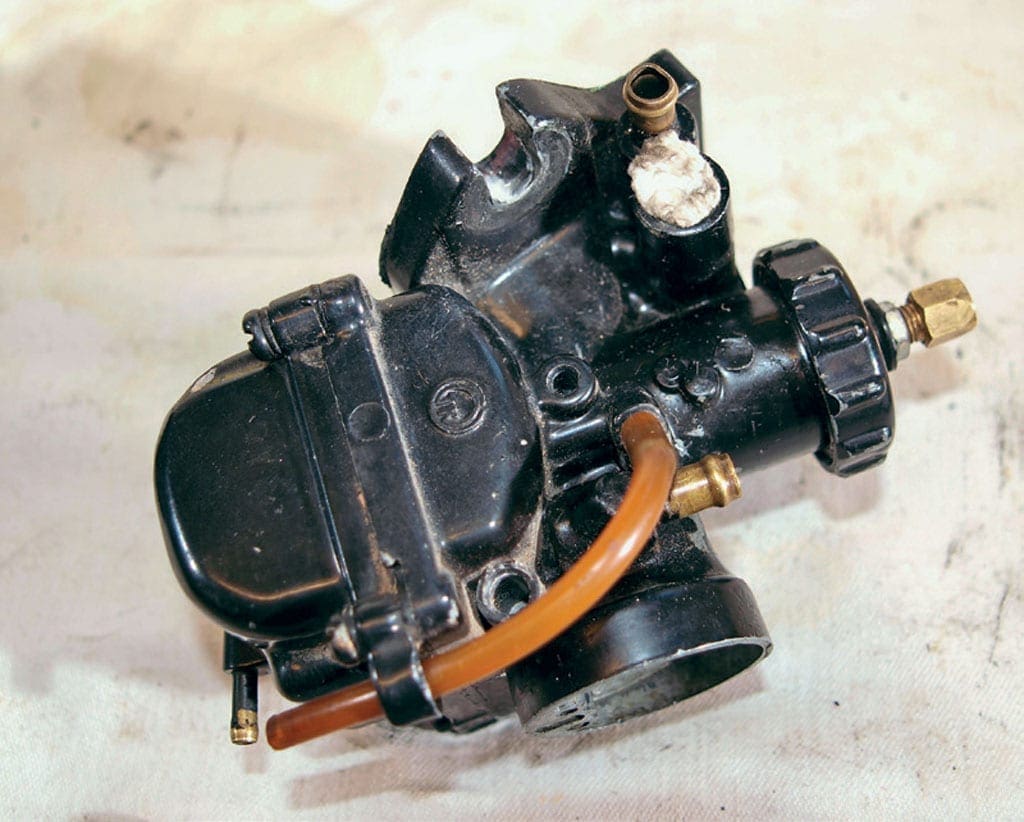
1/ Before ripping stuff apart it pays to take stock of what we have. Someone has stuffed some paper towel into a casting and the brass balance pipe spigot has taken a tumble at some point. Anomalies such as this are worth noting.
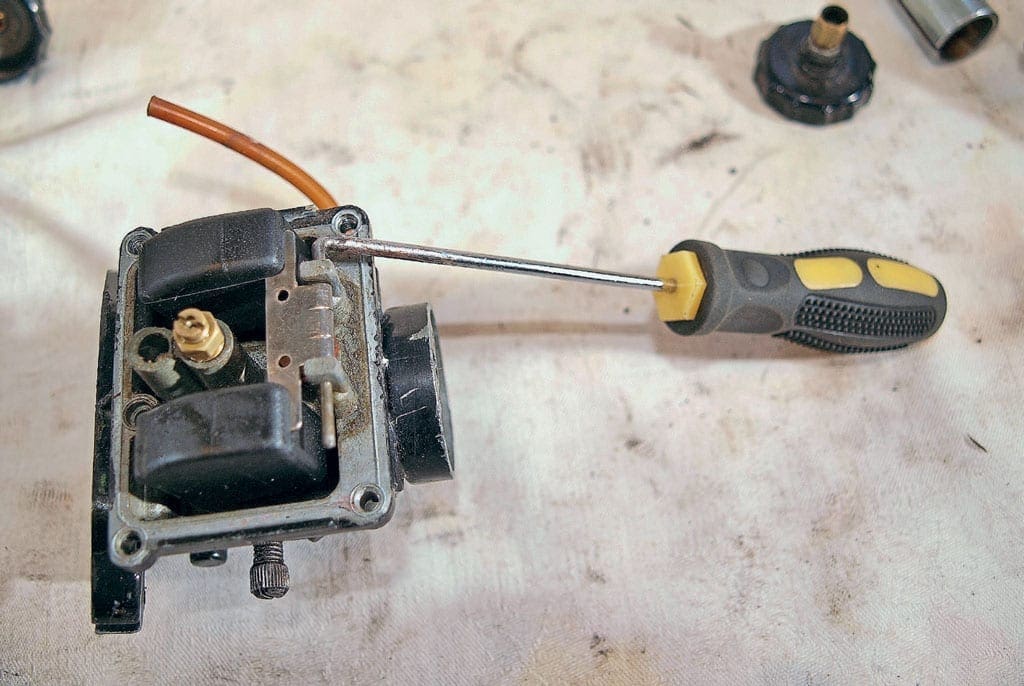
2/ Having made copious notes of tickover and pilot air screw settings, the float bowl is removed and float pin carefully evicted. The alloy posts that support the pin and float are easily broken, so patience and easing oils may be necessary here.
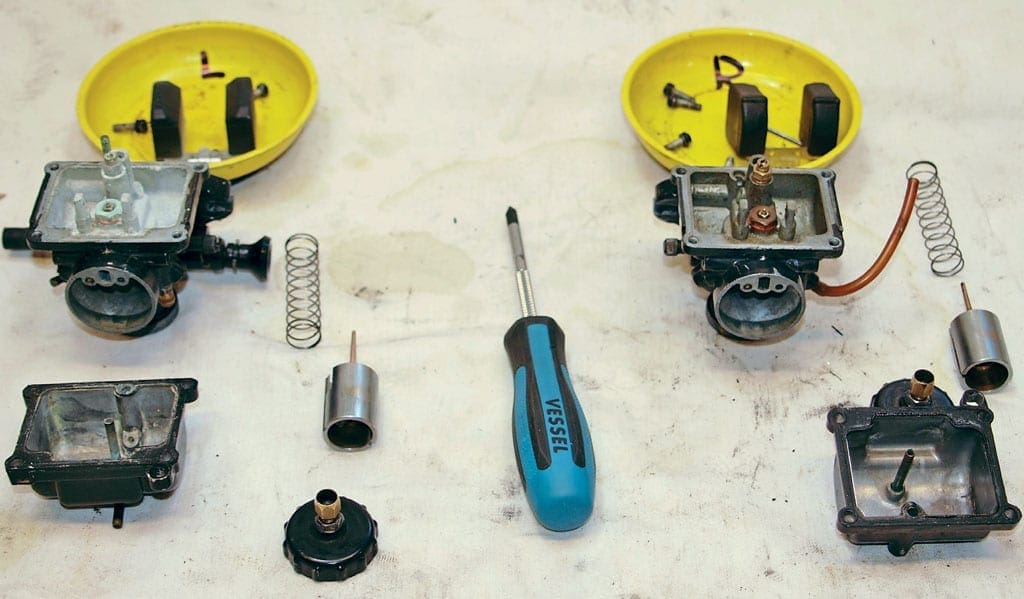
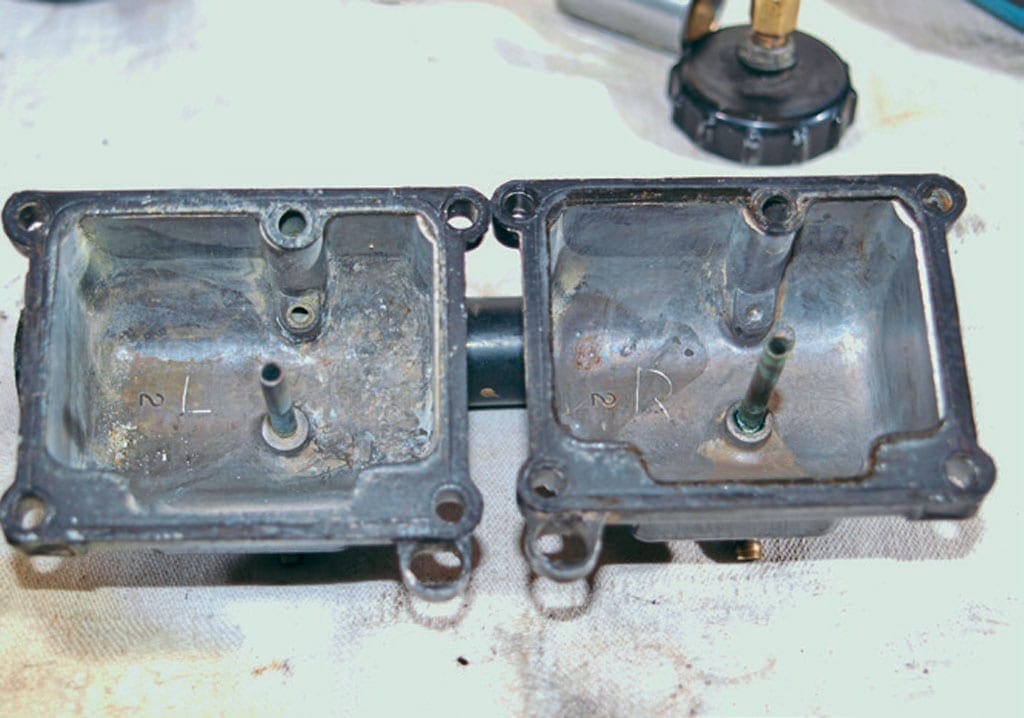
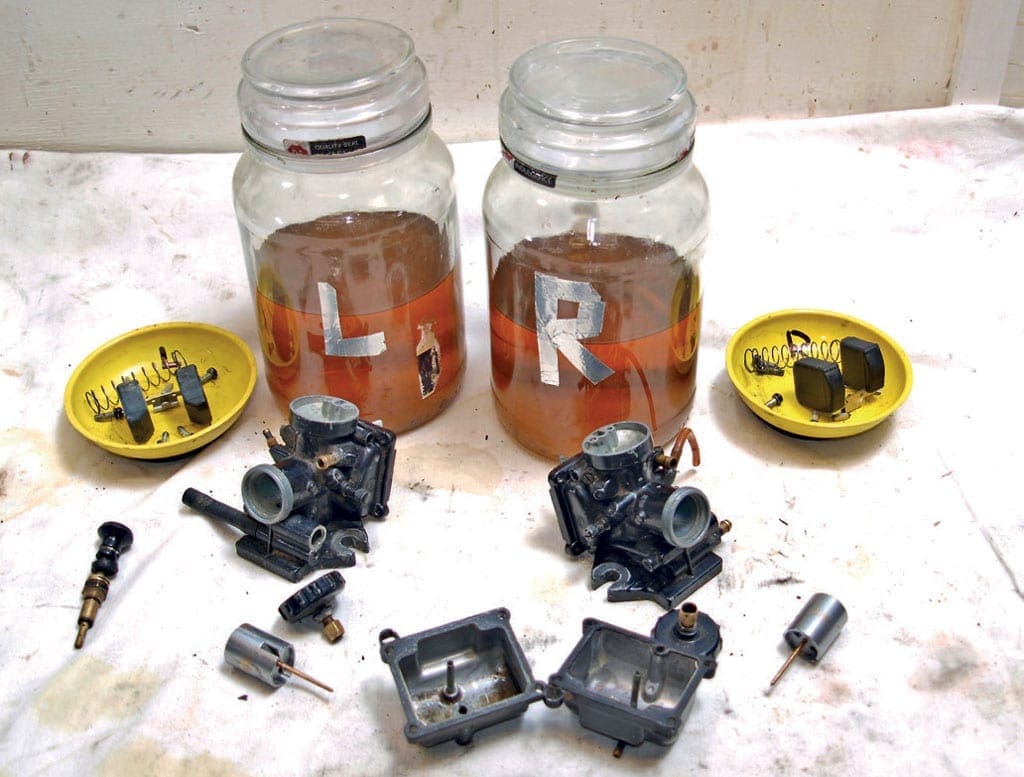
3/ Both carbs are now broken down into the major constituents for inspection and examination. Keeping the ‘Left’ and ‘Right’ bodies, float bowls and associated giblets separate is vital. Remember, only ferrous-based components stay put in a magnetic parts tray.
4/ The hard chrome plating of the brass slides is showing signs of wear. This could be due to poorly mounted carbs, loose carbs tops or even loose engine mounts, or it could just be from use. If there are any noticeable ridges or scars, they’ll either need replacing or replating, but we’ll get away with these, hopefully.
5/ Always label float bowls! Only the left one has the drilling for the starter jet circuit. Get these round the wrong way and you’ll be struggling big time to start the bike later.
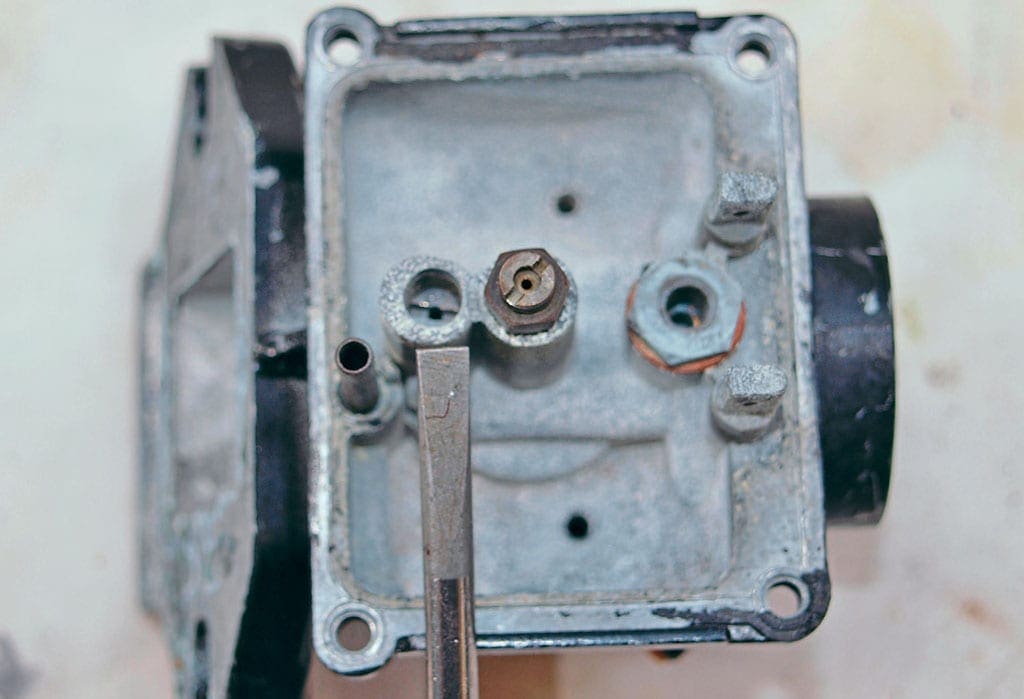
6/ Before it gets lost, the float valve is lifted out and stored in a sealed, labelled bag for cleaning and inspection
7/ Use only quality screwdrivers with decent ends on slotted jets, or risk damage. If jets are stuck fast, try hot water, easing fluid and/or gentle heating.
8/ Without an ultrasonic tank, a damn good soak in gun wash or cellulose thinners evicts a lot of crud, but beware of solvent attack to some plastics. The floats stood up fine to stewing.
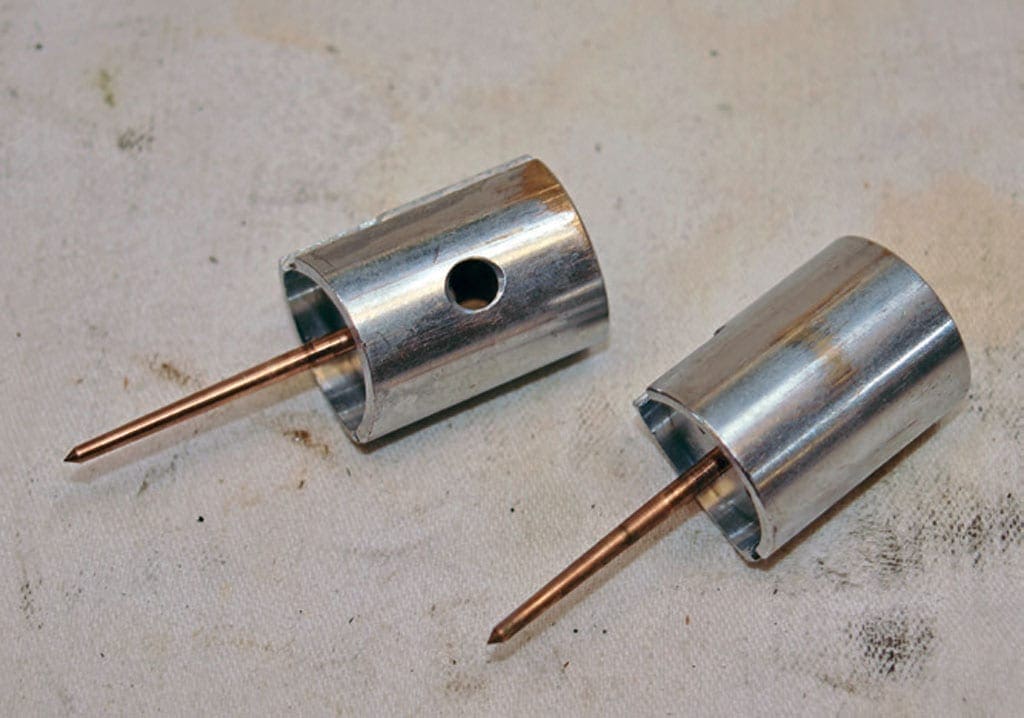
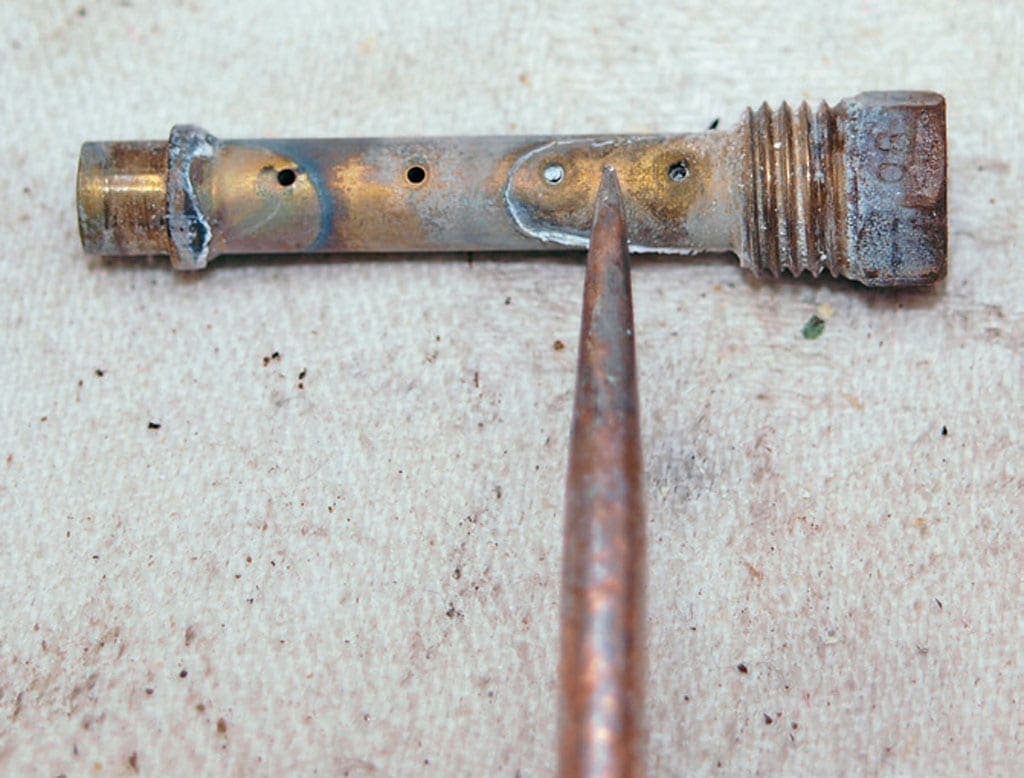
9/ At last, a likely suspect; it’s as plain as the nose on your face that some of the drillings in the emulsion tube are seriously blocked. Looking at the level of corrosion, it’s seriously unlikely that ultrasonic cleaning alone would have sorted this lot out.
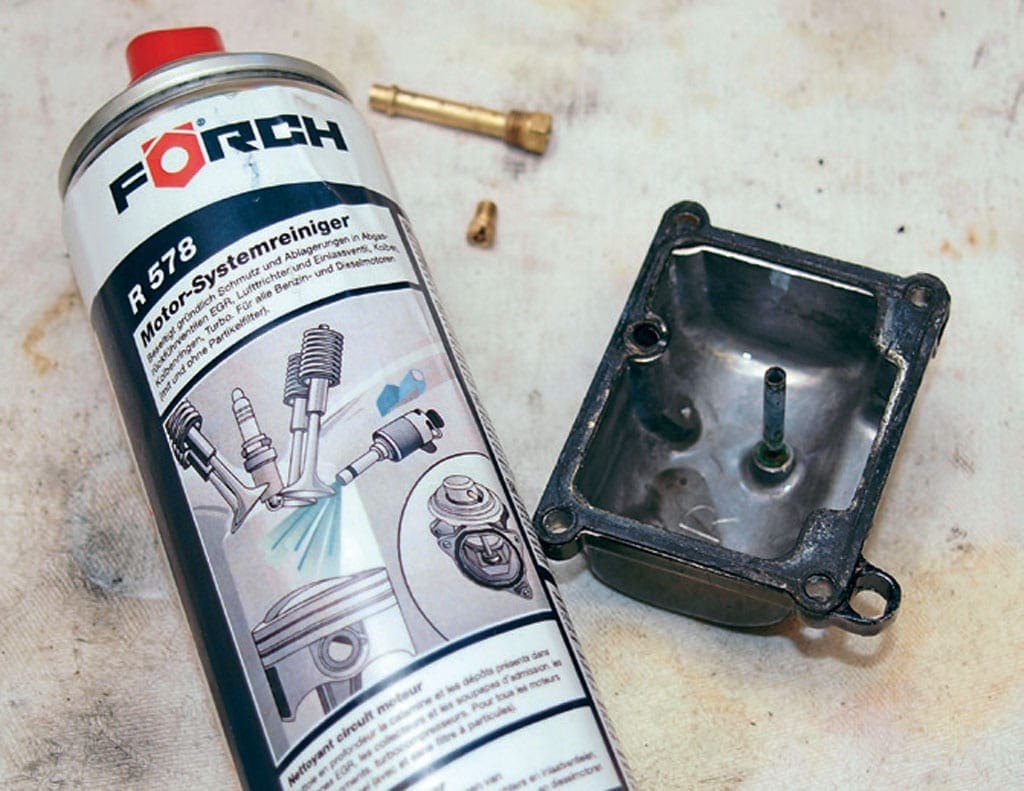
10/ I’ve recently discovered this stuff and it is ace. Dissolves carburettor gum, lifts oxides, eats corrosion and doesn’t attack carb parts. I commend it to the house.
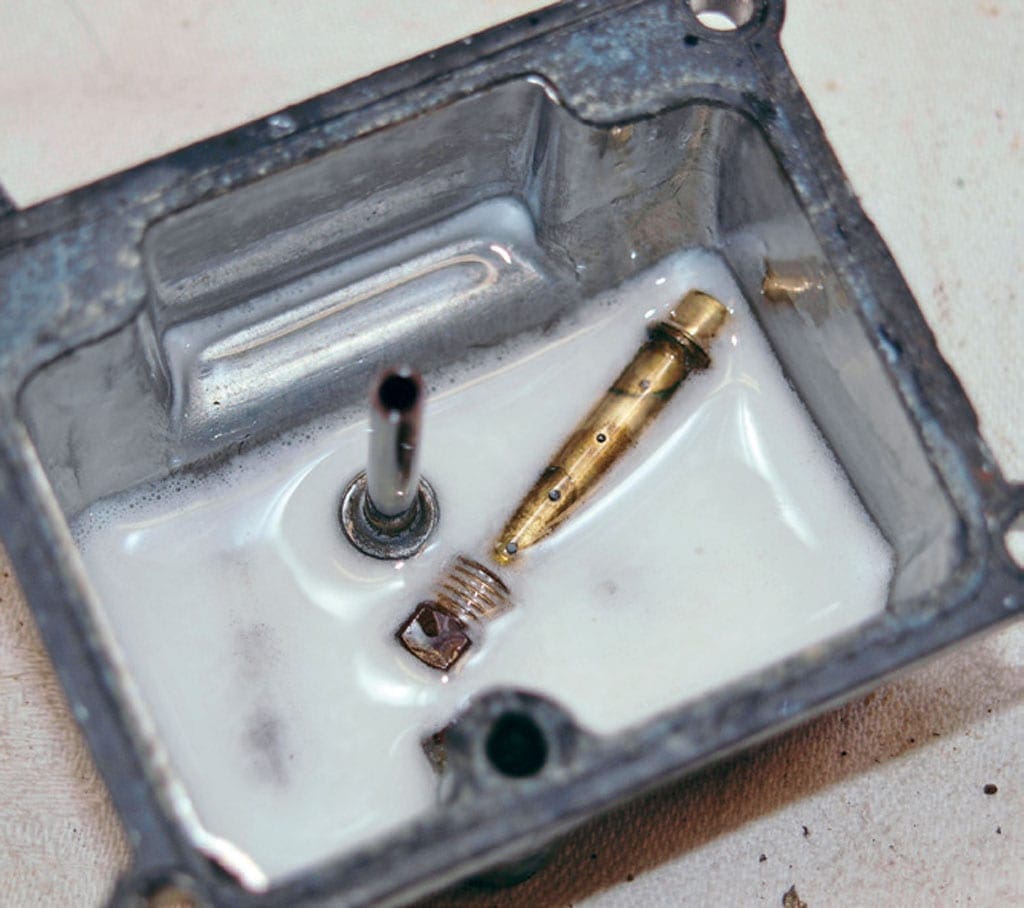
11/ All the grubby parts are dropped into the float bowl and given a bath in FORCH R578 and occasional agitation. The parts get cleaned before your very eyes.
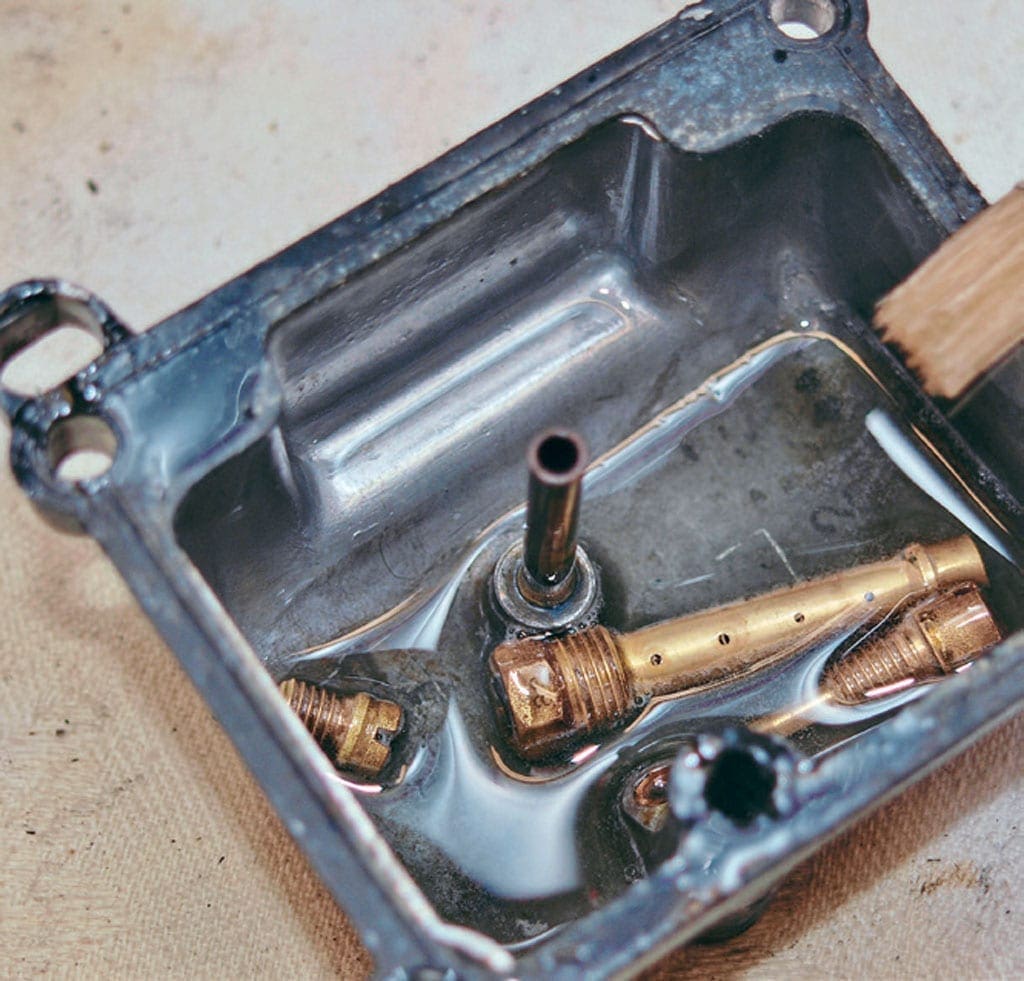
12/ Leaving super-clean brass where there was previously corrosion products, staining and gum.
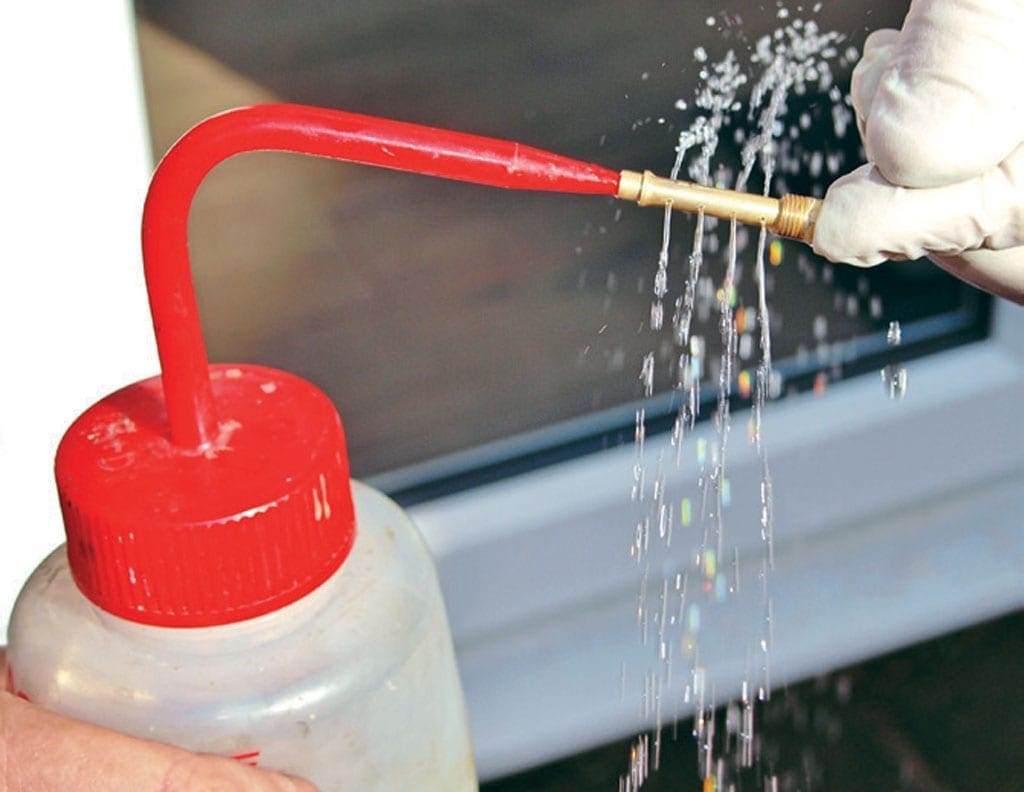
13/ Using a laboratory wash bottle and some isopropanol (both cheap off eBay) everything is rinsed clean. Proof, if it were needed, that all of the holes in the emulsion tube are now completely free of blockages.
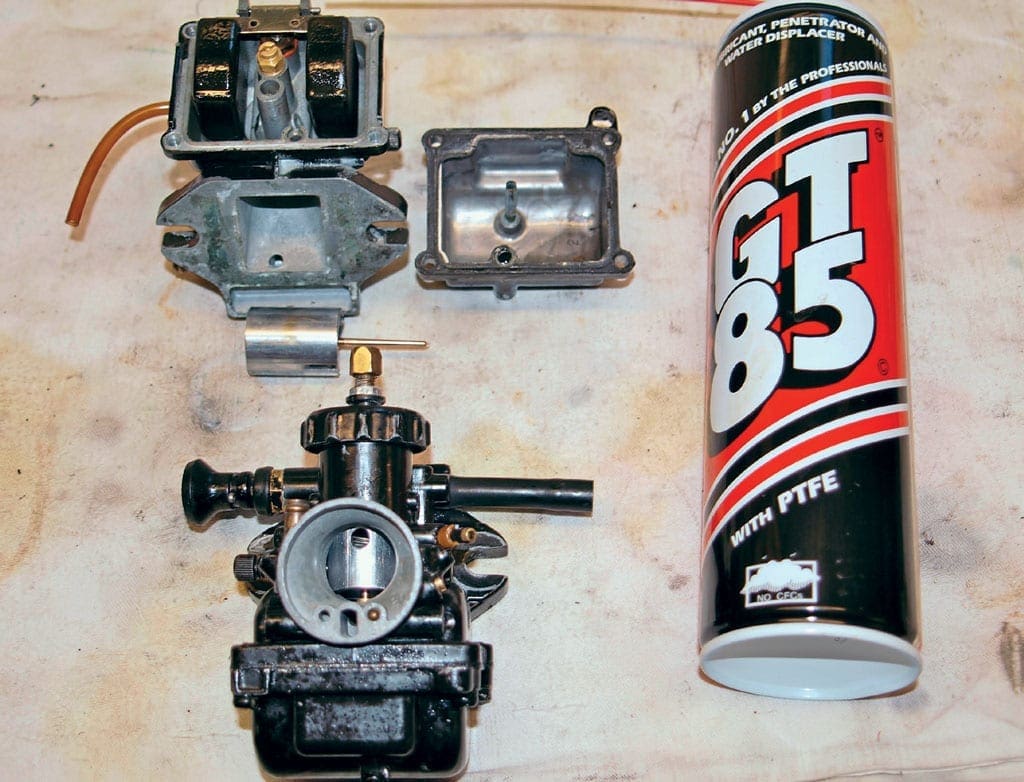
14/ All the parts have checked out OK, so the carbs can be rebuilt ready to use. I always assume they may not go back on to a bike immediately, so give them a good soaking in GT85, which prevents dry parts binding to each other.