How to change your motorcycle spark plugs and air filter
Posted
by
Tony Carter
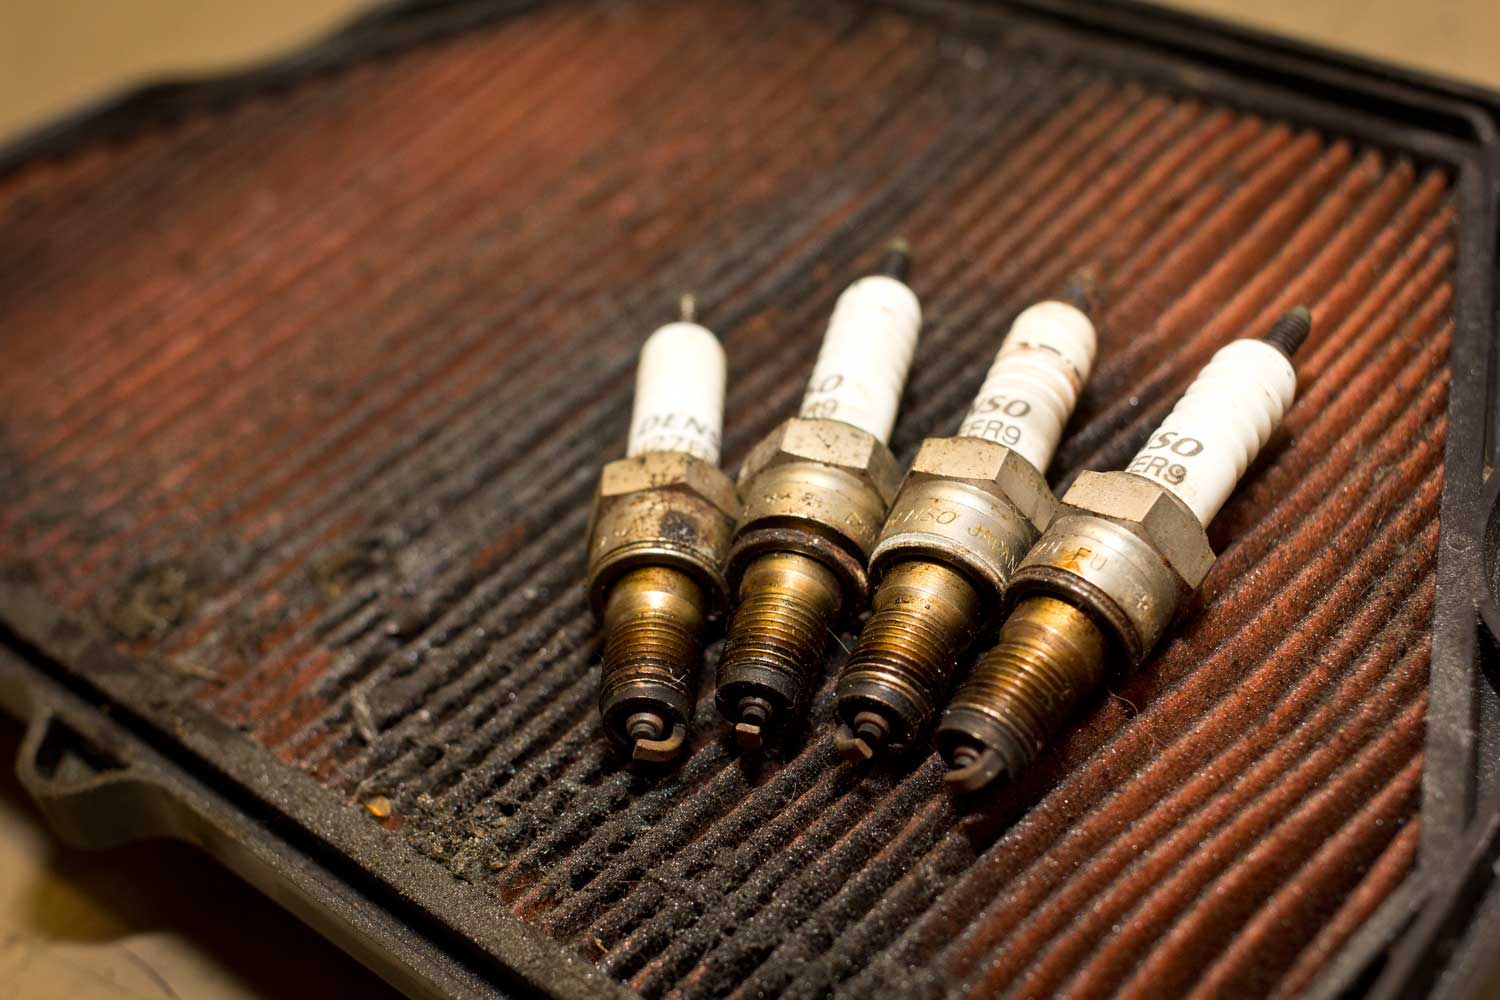
These plugs and filter are way past their prime.
Looking after your bike is easy! John Milbank shows you how with his 2000 Honda CBR600FY.
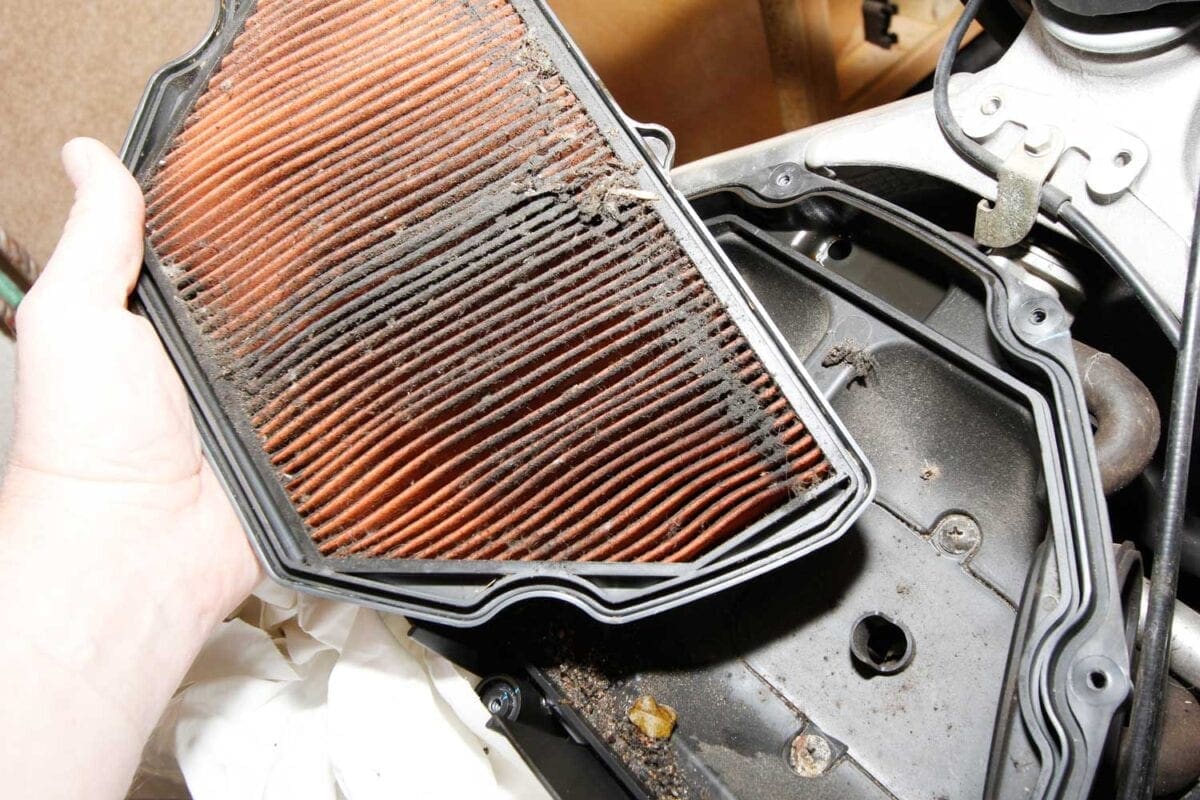
My CBR’s air filter should be changed every 12,000 miles. With just over that on the clock, I expected to find the original still in place. What I found though just proves it needs changing earlier.
A clean filter lets the engine breathe properly. If it’s clogged, the bike could run ‘rich’ (too much fuel in the mixture that’s squirted into the cylinders), making for poor running and inefficiency.
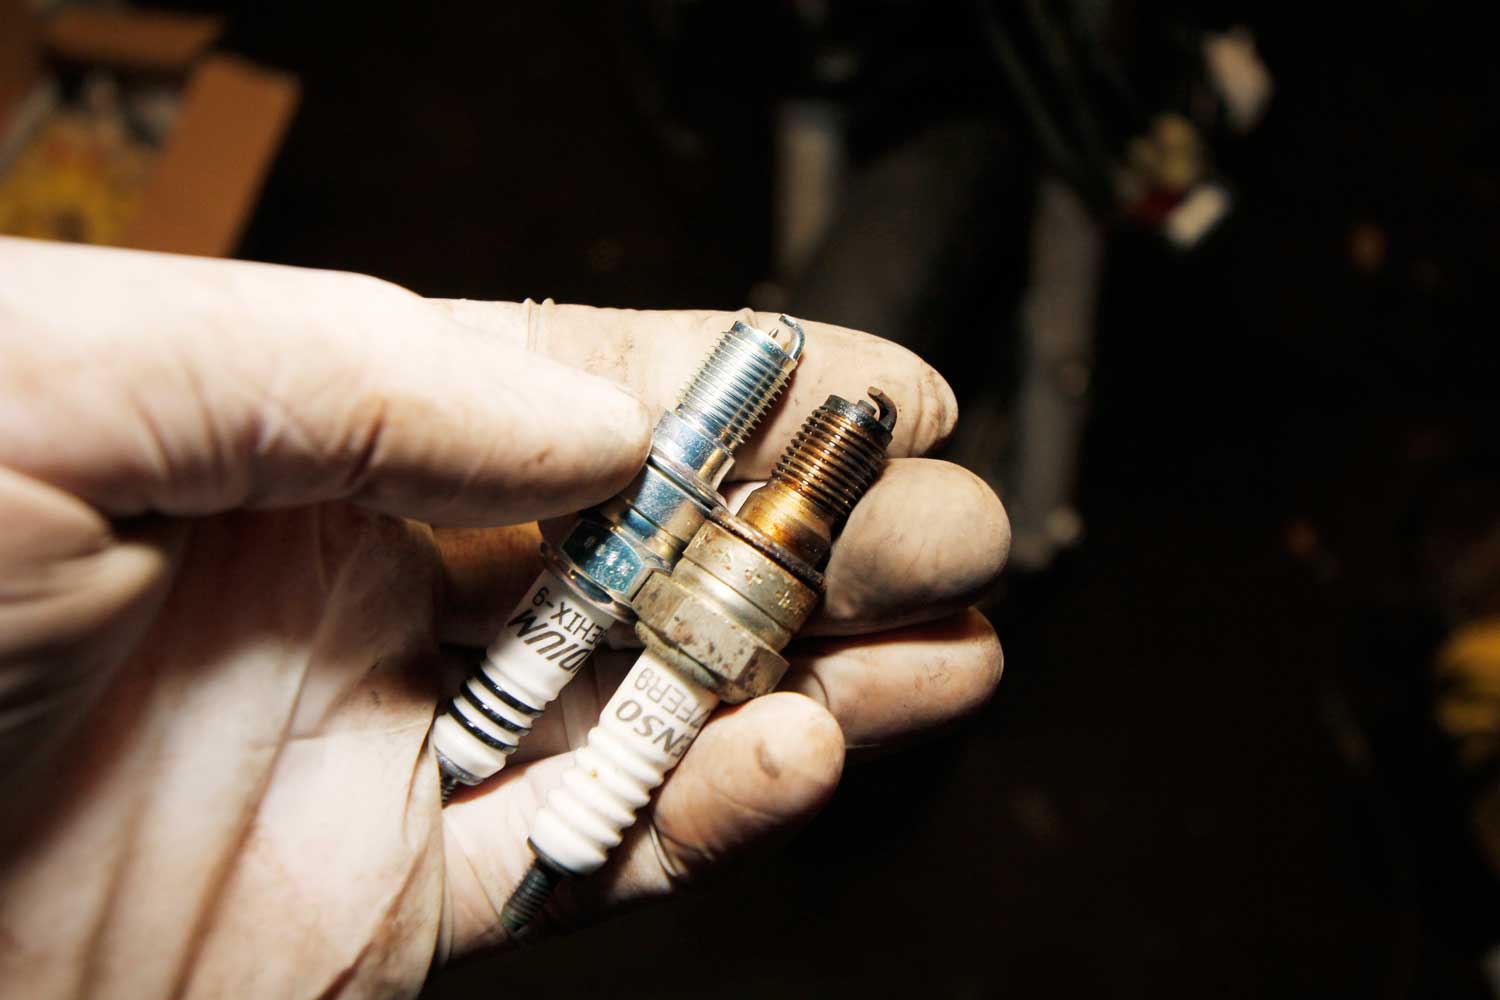
Enjoy everything More Bikes by reading the MoreBikes monthly newspaper. Click here to subscribe, or Read FREE Online.
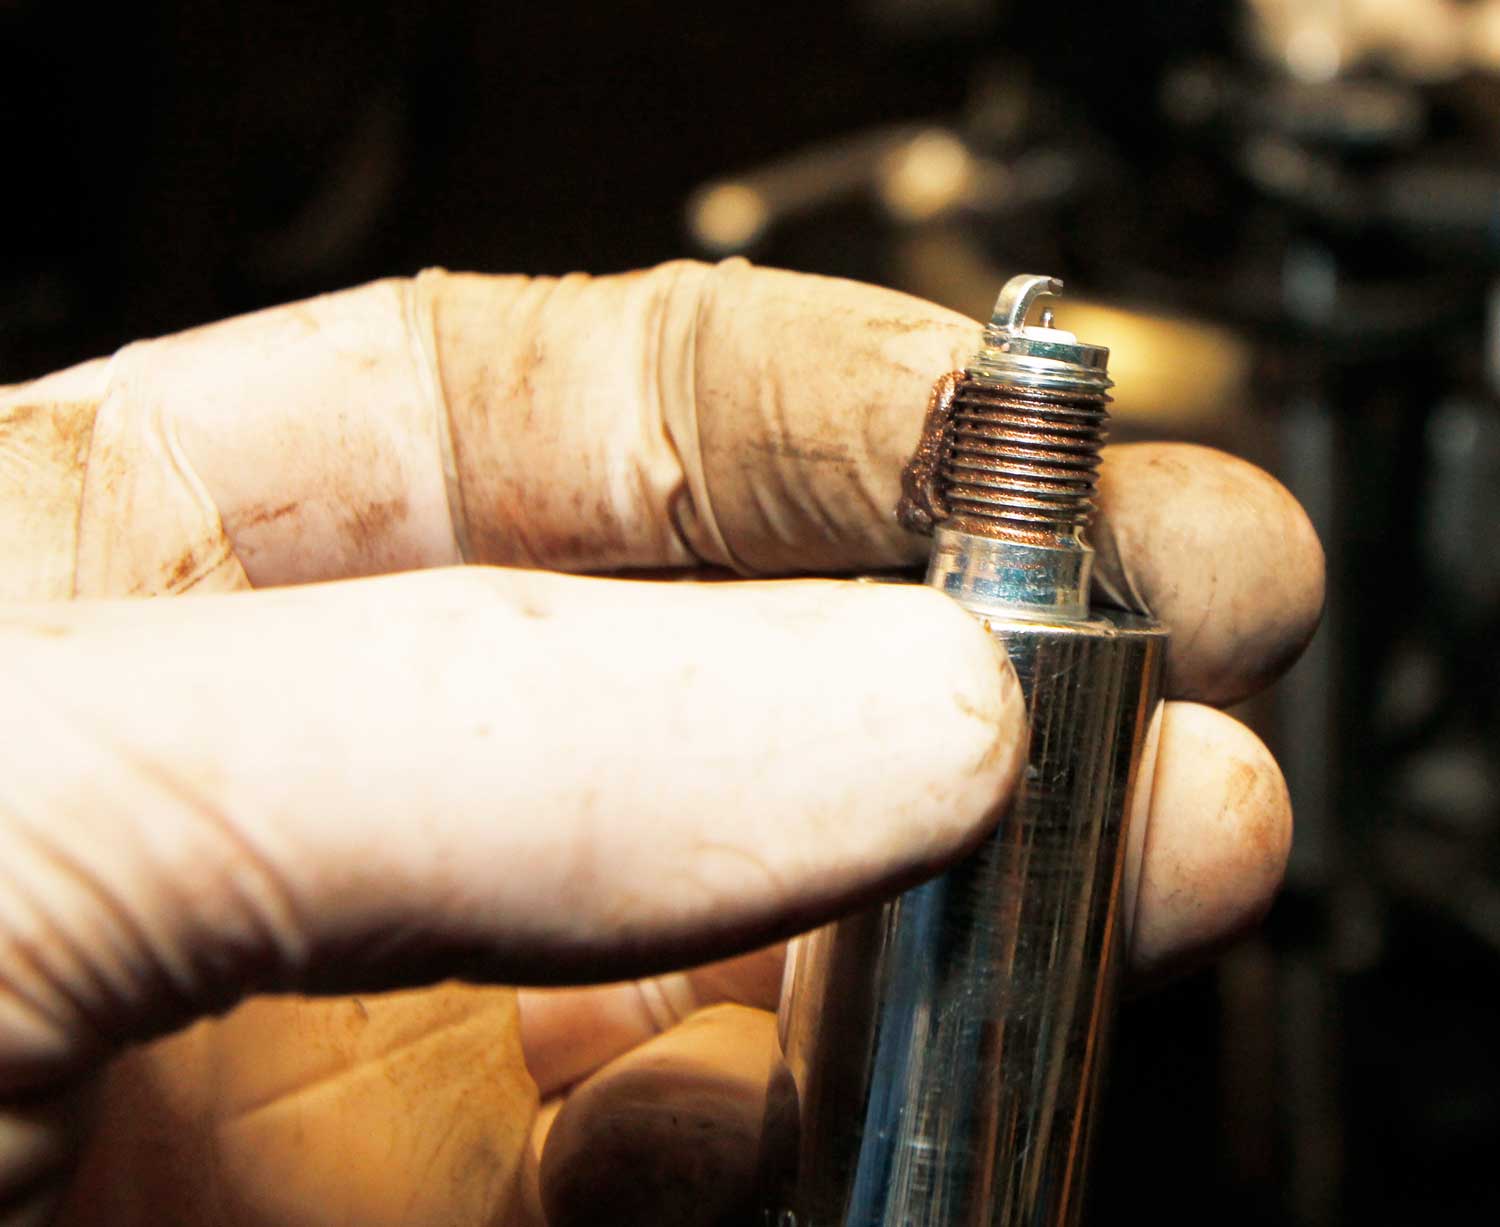
To get to the filter, the tank has to come off, and as the more expensive spark plugs should be replaced every 8000 miles, I figure both jobs might as well be done together. This article will run through the work I did, but I strongly recommend you treat yourself to Clymer or (and!) Haynes workshop manuals, even if you’re working on the same bike as me. They’re invaluable, and a geeky pleasure to read too…
1: The CBR’s tank is removed with two screws at the headstock, and two beneath the seat. There’s not much slack underneath, so it needs carefully lifting to expose the pipes and wires. You can mark these with a bit of tape, so you know where they go, but don’t forget to turn the fuel tap off first. It’ll be different on other bikes, especially fuel-injected, but grab yourself a workshop manual and it’s easy. Pop the tank safely out of the way on a bench.
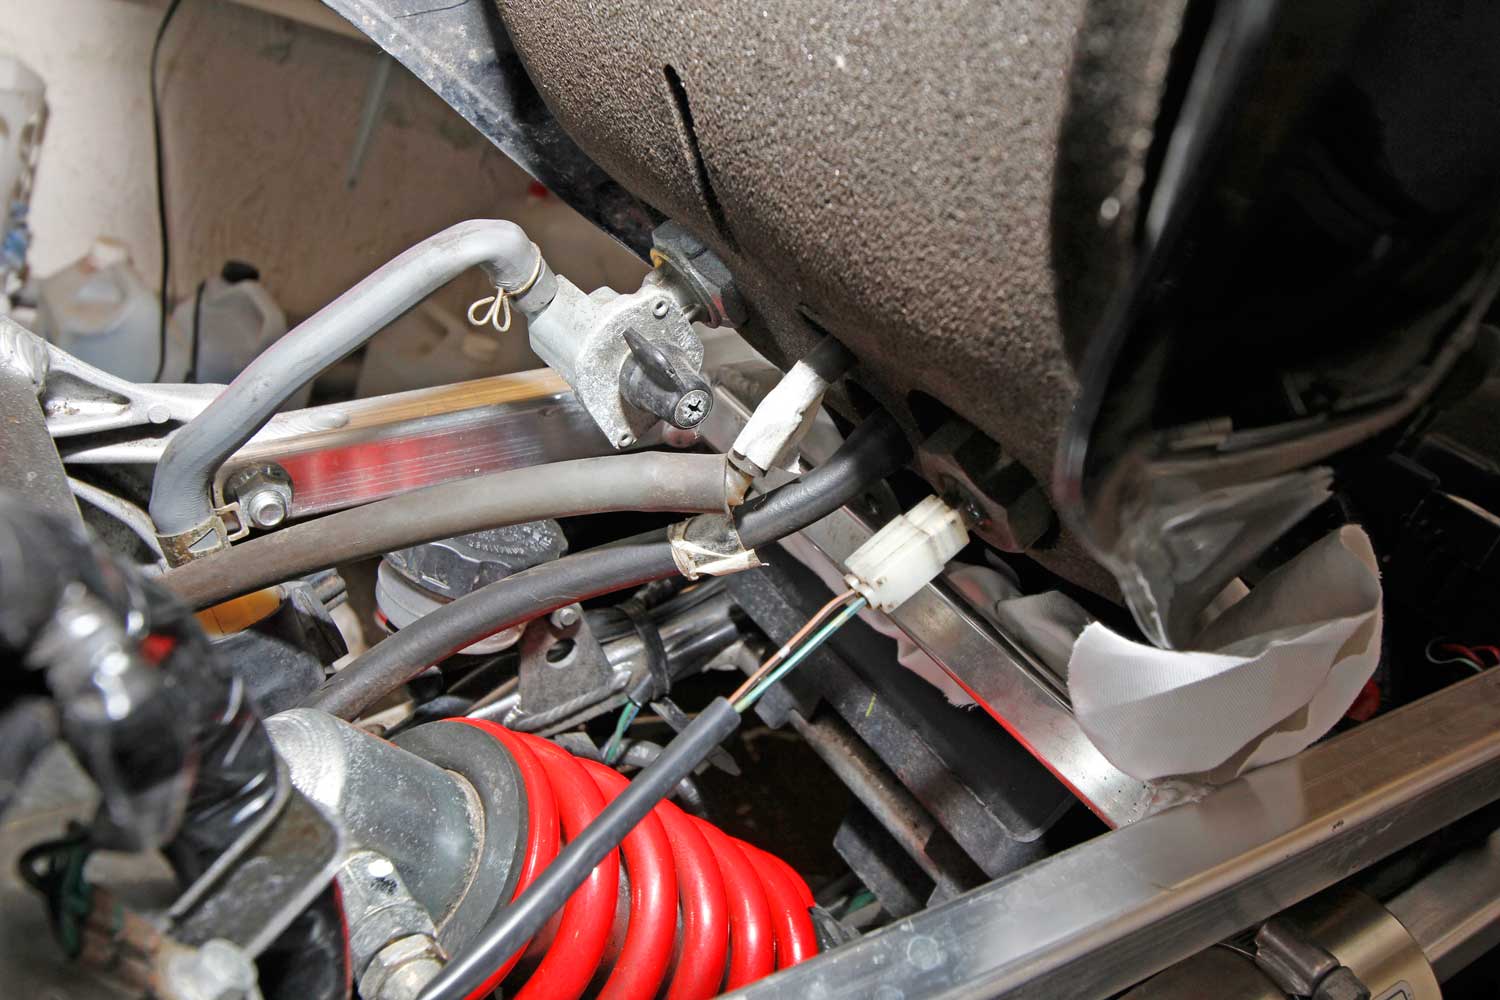
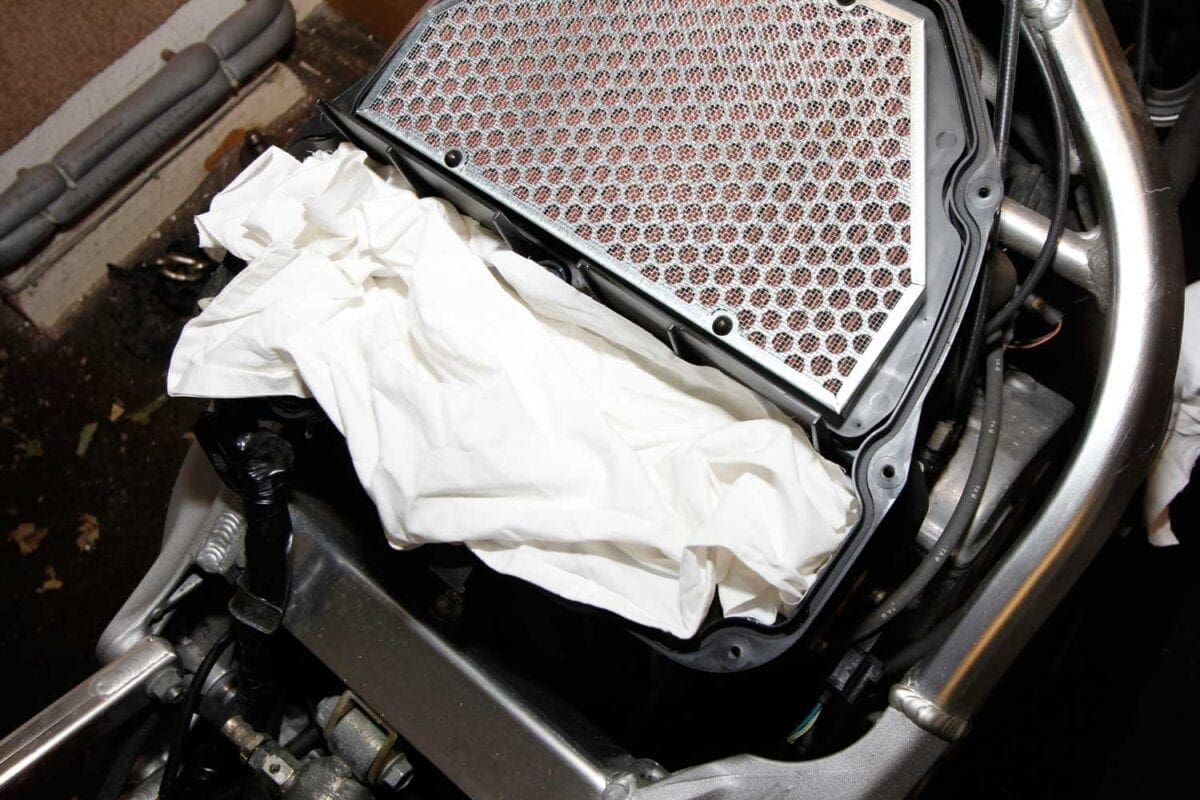
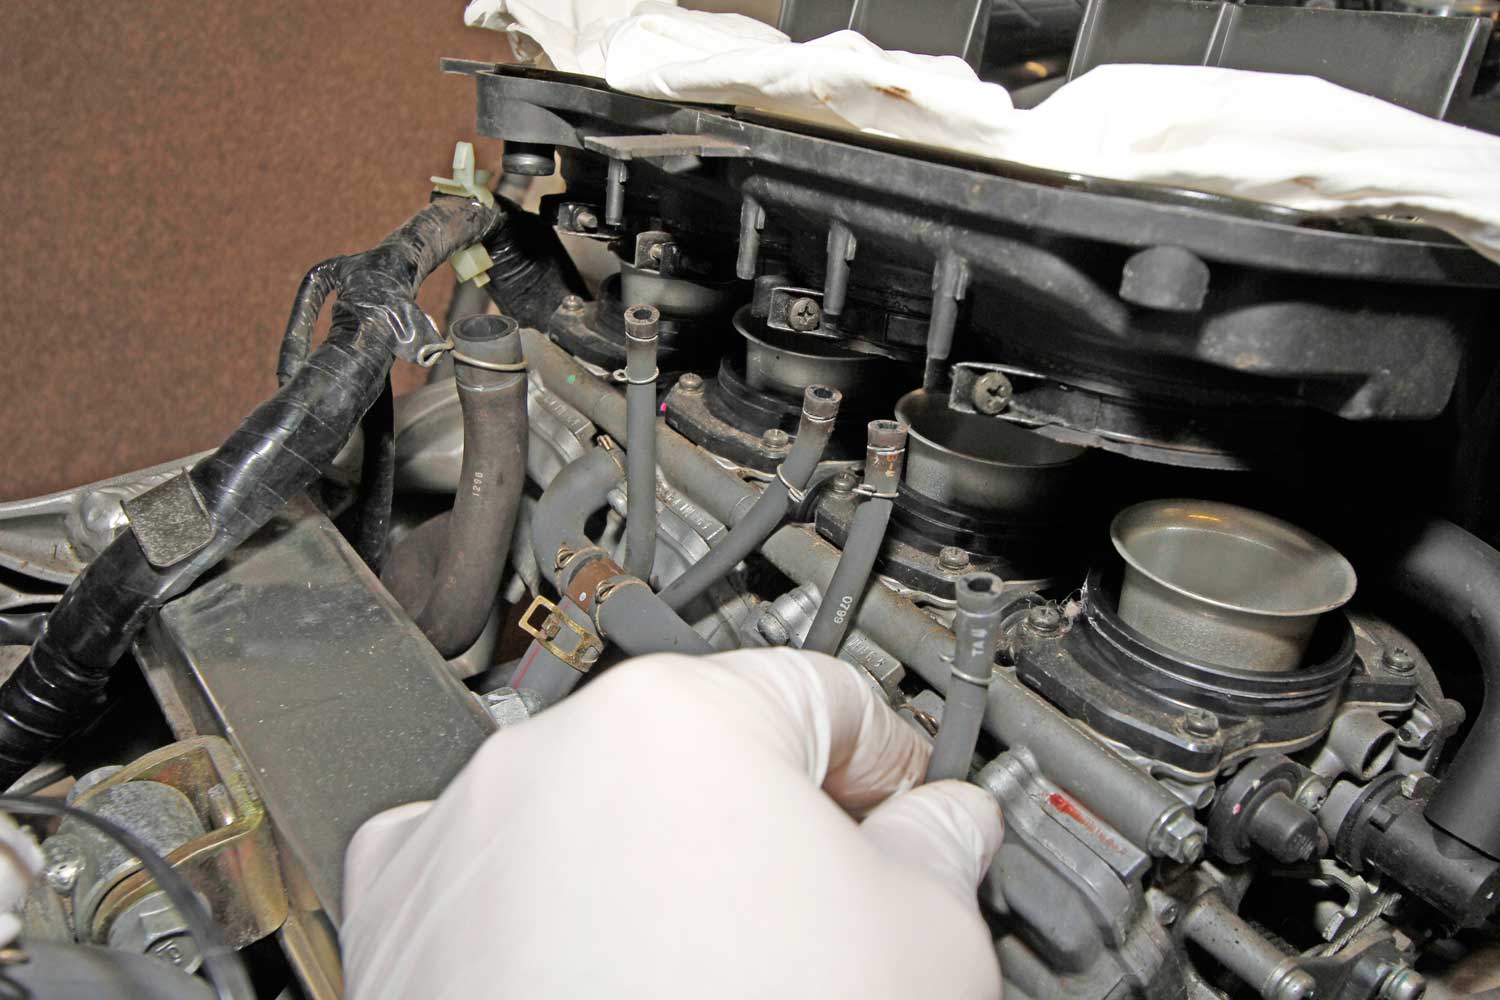
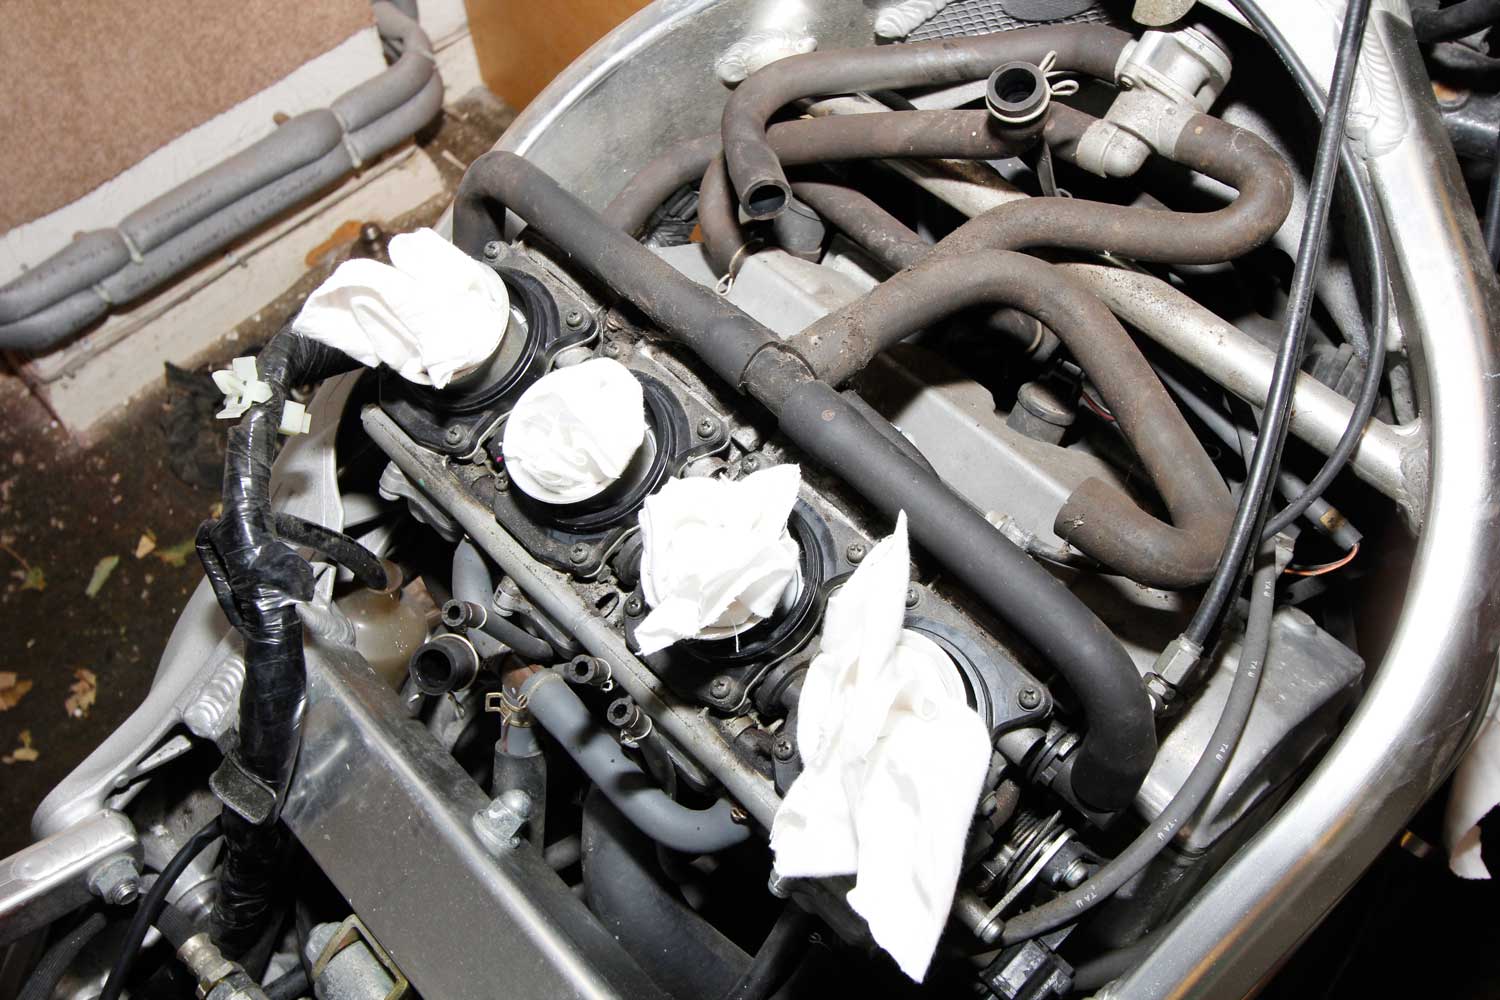
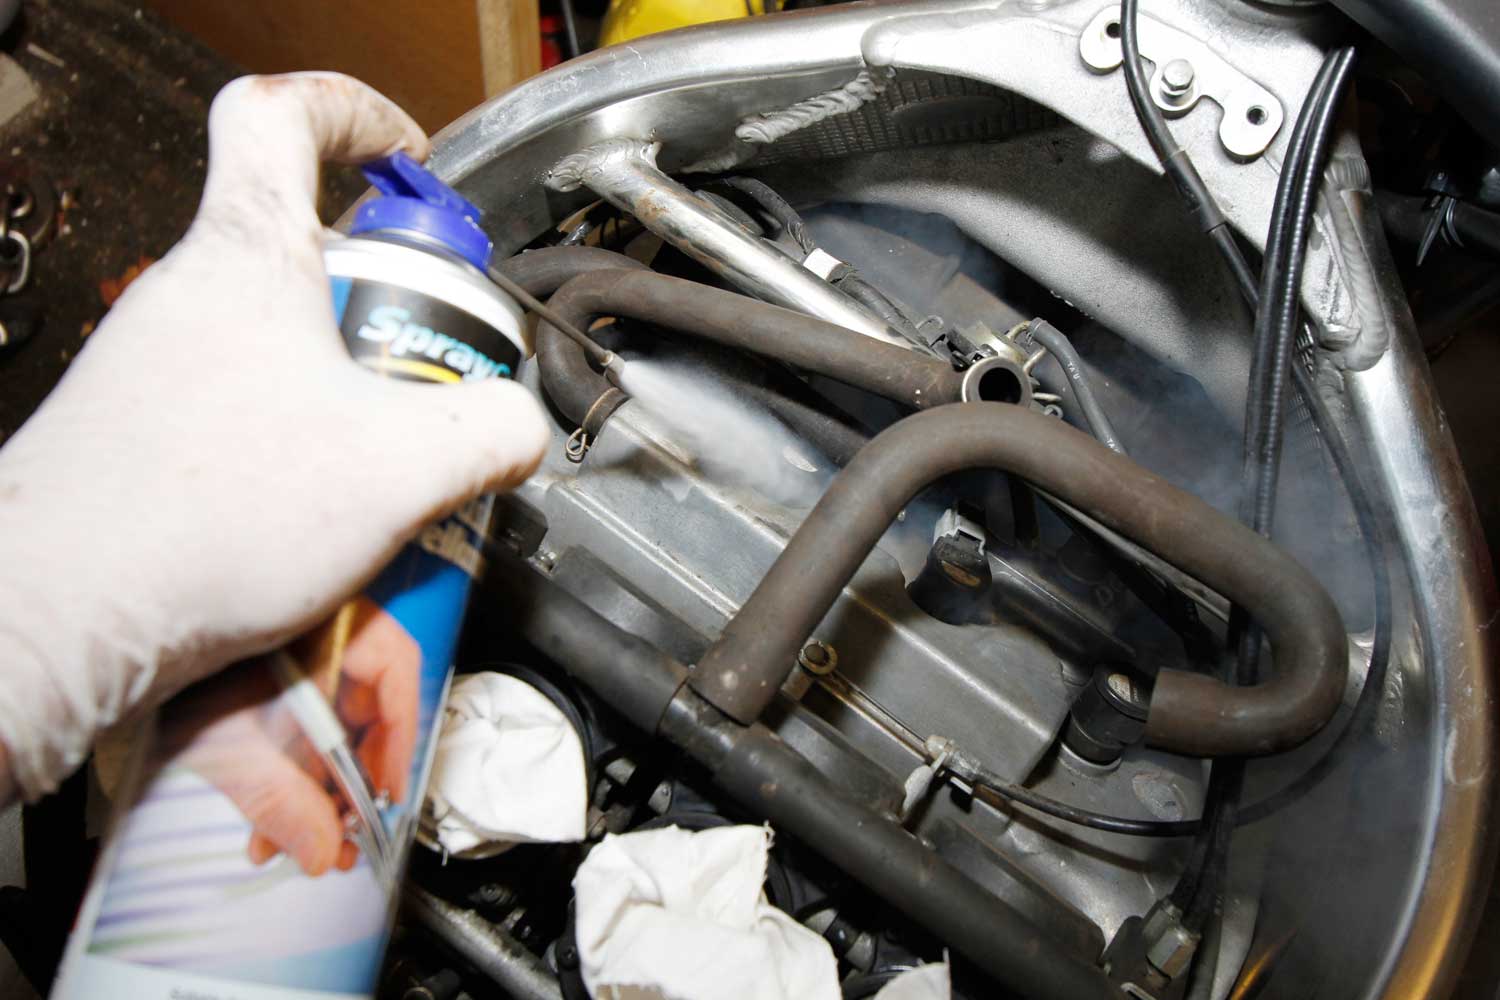
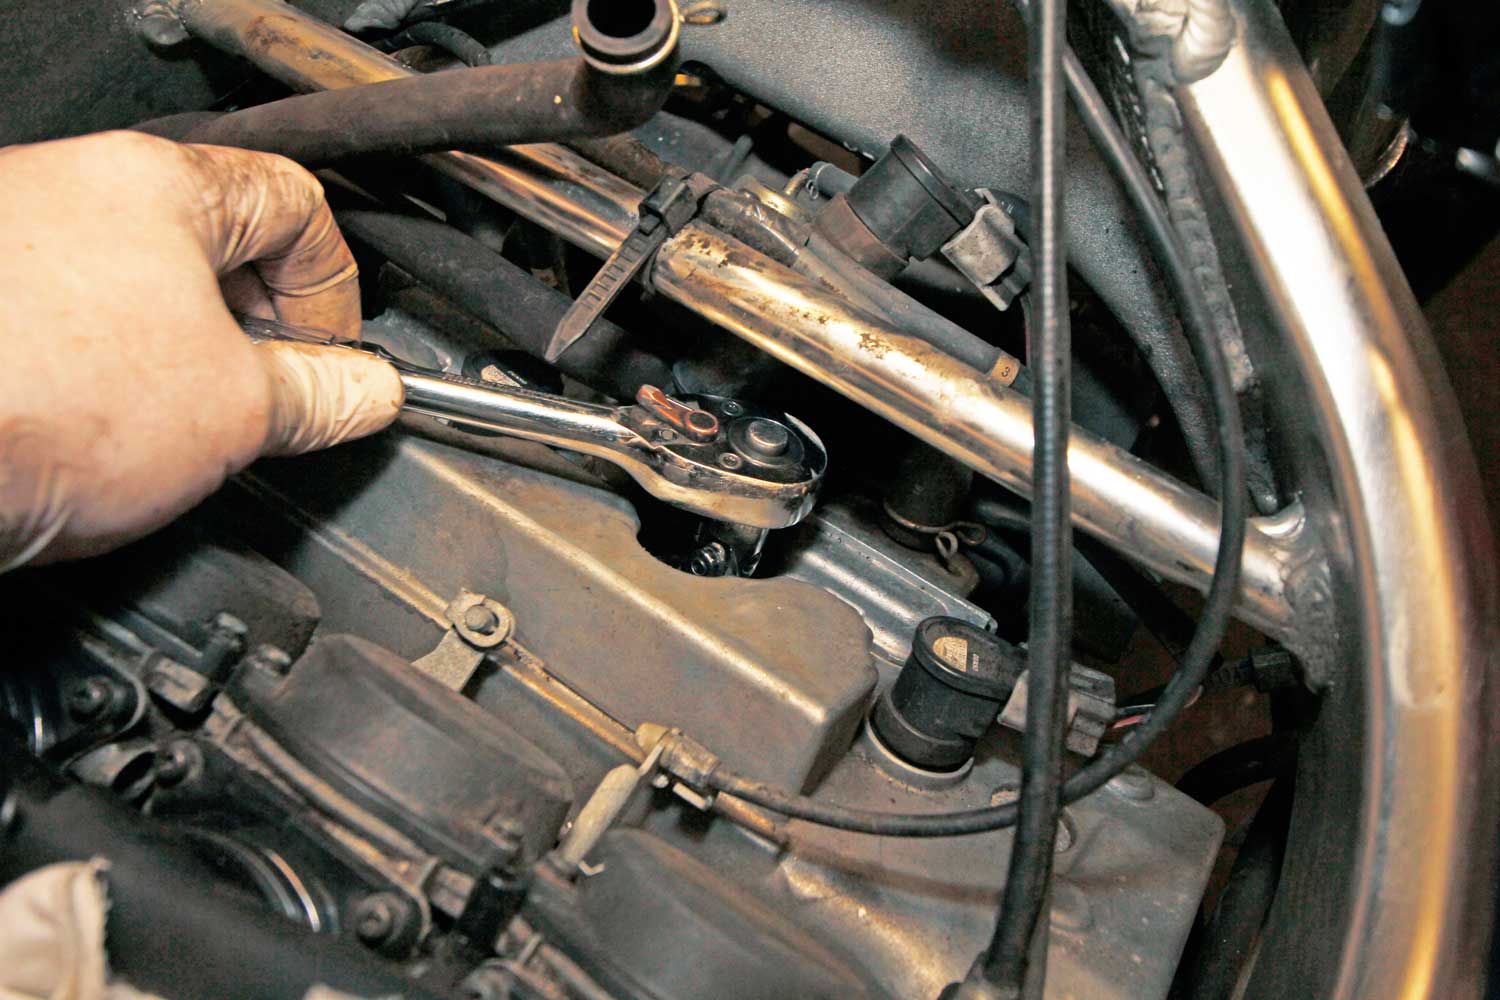
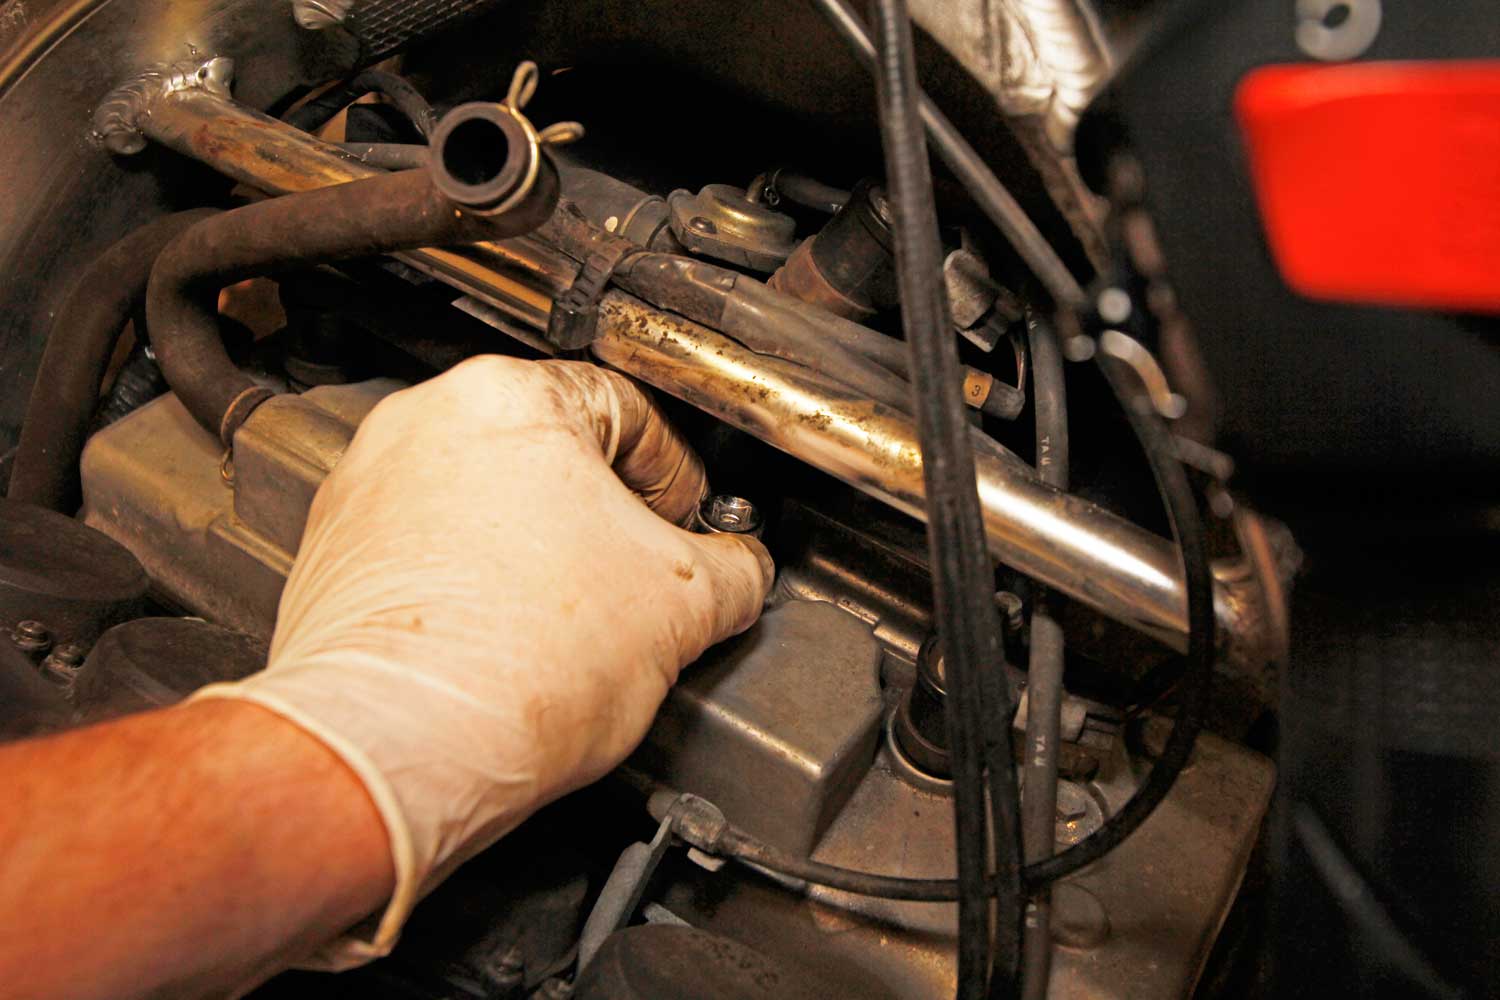
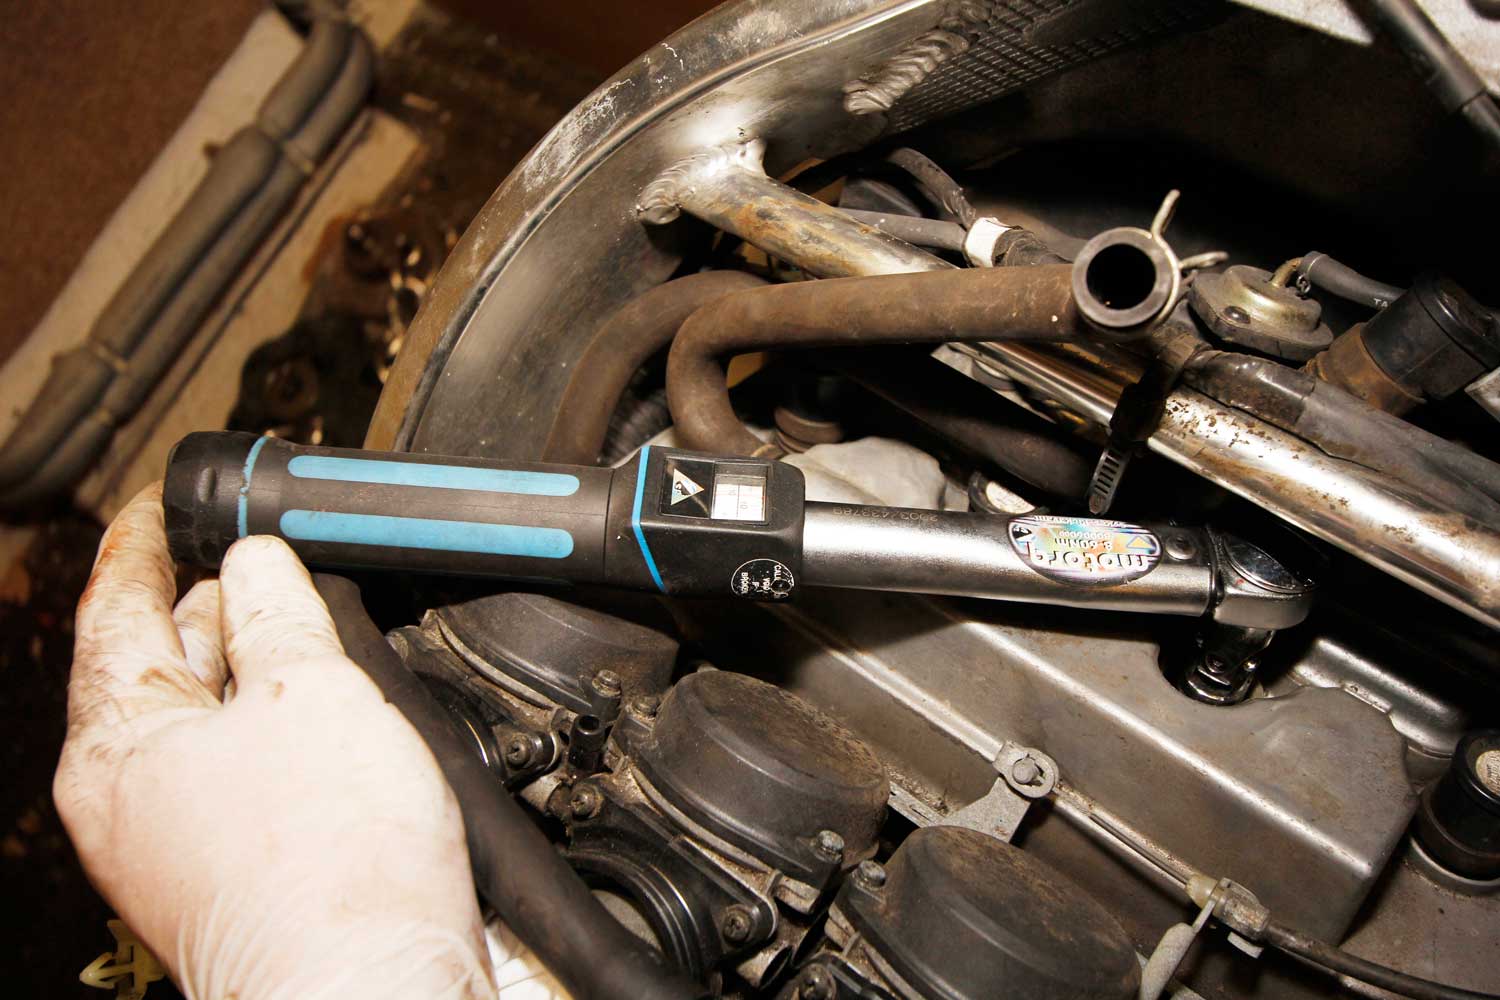
2: Unscrew the top of the air box, and you’ll find the filter. Lay a clean piece of rag over the carb inlets to stop anything dropping down there.3: This is nasty. The filter’s only just past its scheduled service, but it’s packed with dead flies and road muck. Chuck it away, and carefully clean any rubbish out of the bottom of the air box.4: Theoretically, the plugs can be changed from behind the radiator, but I find it a lot easier to go in from the top. The four clamps that attach the air box lower to the carbs need loosening, and the vacuum pipes have to come off their blank plugs.5: With the air box removed, gently plug the carb inlets with clean rags. Also take some time to study the layout of the pipework, and take a photo with your phone too.6: I’ve stripped out some of the emission-control pipes, to make access to the plugs easier. I don’t have an airline, so I bought a can of airbrush propellant from Halfords, and attached a Kenro Air Duster Valve (£8.99 from eBay) to let me blow any grit and dust away that could fall into the cylinder when the plugs come out.7: Pull the coils out of the cylinder head. They’re only just the right length to go back in the right holes, so you shouldn’t be able to muddle them up. Then use a ratchet with a spark plug socket (it’s got a rubber grommet inside to hold onto the plug once it’s free) to remove the plug.8: Double-check that you’ve bought the right plugs by holding the old and new ones next to each other and checking they’re the same length. I also check the plug’s gap too (see link).9: Pop the new plug into the socket, being careful not to press on the electrode, then give the threads a light wipe of copper-grease, to stop them seizing.10: With an extension on the socket, but NO ratchet, gently lower the plug into the engine, making sure you don’t catch the electrode. Once it’s sitting on the threads, I turn it slowly backwards – as if I’m undoing it – until I feel the plug’s threads drop into the start of the engine’s threads. Then do it up by hand until it gets to the bottom. This is the best way to make sure you don’t cross-thread the plugs, which is a very costly mistake.11: Plugs can be fitted by tightening half a turn with a standard ratchet once the plug’s gasket meets the cylinder head. I far prefer the accuracy, reliability and safety of using a torque wrench.12: With the new plugs in, and the coils firmly seated on the plugs, refit all the pipework, screw the airbox back on then drop in your new air filter. With the air box reassembled and the tank back on, you’re all finished. Job done!